Are you ready to transform your space with beautiful and durable vinyl plank flooring? If so, then you’re in the right place! In this blog post, we’ll guide you through the process of staggering vinyl plank flooring to achieve a professional and visually appealing look. Whether you’re a seasoned DIY enthusiast or just starting out, we’ve got all the tips and tricks to help make your project a success. So let’s roll up our sleeves and get ready to create a floor that will have everyone saying, “Wow!”
Tools and Materials Needed
Before we begin, let’s make sure you have all the necessary tools and materials to complete your vinyl plank flooring project. Here’s a handy checklist:
1. Vinyl Plank Flooring: Choose the style and color that best suits your space. Measure the area accurately to determine how much flooring you’ll need.
2. Underlayment: This thin layer goes between the subfloor and vinyl planks, providing cushioning, moisture protection, and sound insulation.
3. Measuring Tape: Essential for getting accurate measurements of your floor space.
4. Utility Knife or Vinyl Cutter: These tools are used to cut the vinyl planks to fit around corners or edges.
5. Tapping Block and Pull Bar: These will help secure the planks together during installation without causing any damage.
6. Rubber Mallet: Use this tool gently when tapping on stubborn pieces that need extra persuasion to fit snugly into place.
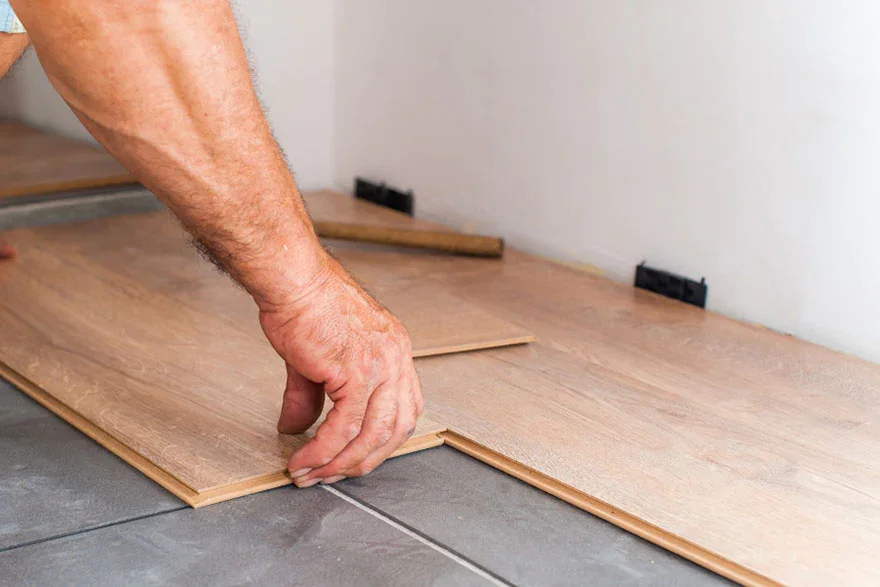
7. Spacers: These small wedges ensure you leave enough room along walls for expansion once installed.
8. Adhesive (if applicable): Some vinyl planks require adhesive for proper adhesion to the subfloor – check manufacturer instructions before proceeding.
Now that you have all your tools and materials ready, it’s time to move on to the exciting part – installing your staggered vinyl plank flooring!
The Process
Now that you have all your tools and materials ready, it’s time to dive into the process of staggering vinyl plank flooring. Before you start, make sure to clean and prepare the subfloor properly for a smooth installation.
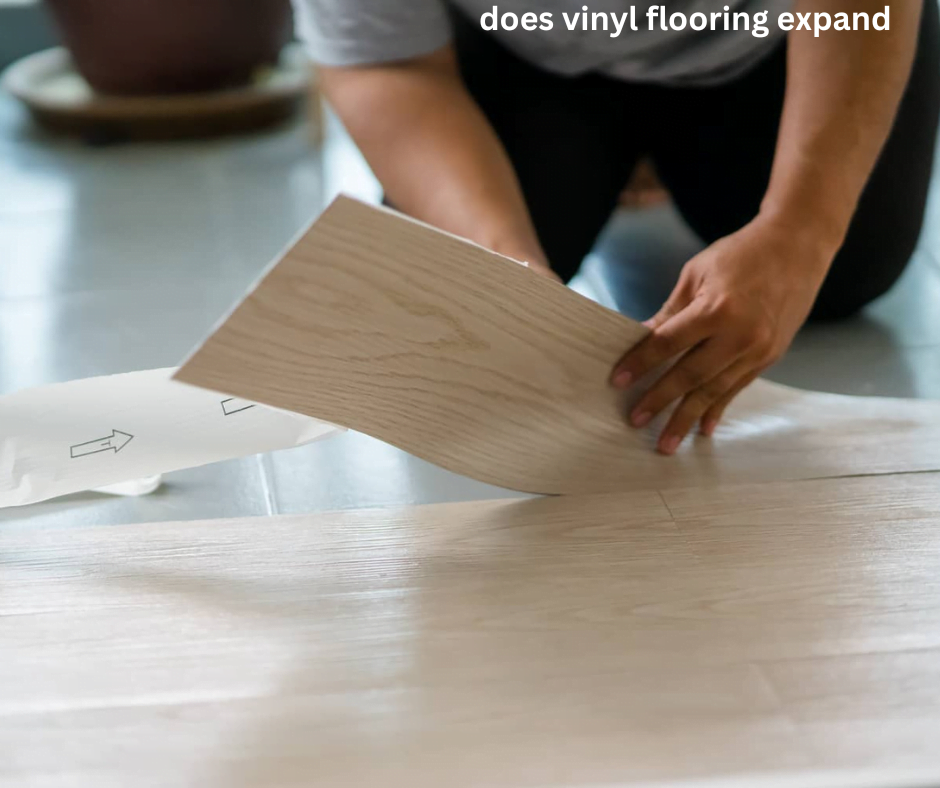
First, lay out your first row of planks along one wall. Remember to leave a small gap between the edge of the plank and the wall to allow for expansion. Use spacers if needed.
Next, take your second plank and place it at an angle against the end of the first plank. Gently push down to click them together. Continue this pattern with each subsequent plank, creating a staggered effect.
As you work your way across the room, don’t forget to use tapping blocks and rubber mallets when necessary to ensure tight fits between planks. This will help prevent any gaps or unevenness in your flooring.
When you reach the last row, measure and cut planks accordingly using a utility knife or a power saw. Make sure they fit snugly against walls or obstacles.
Once all planks are installed, go back through and remove any spacers used during installation. Give yourself a pat on the back – you’ve successfully staggered vinyl plank flooring!
Remember that practice makes perfect when it comes to installing vinyl plank flooring. Take your time, follow these steps carefully, and soon enough you’ll have beautiful new floors in no time!
Finishing Up
Once you have staggered your vinyl plank flooring and are satisfied with the layout, it’s time to move on to the next steps of finishing up. This stage is crucial in ensuring that your installation looks professional and lasts for years to come.
Carefully trim any excess planks using a utility knife or a saw. Pay attention to areas around walls, doorways, or other obstacles where the planks need to fit snugly. Take your time during this step as precision is key.
Next, make sure all edges and joints are properly sealed. Use a silicone caulk or adhesive specifically designed for vinyl flooring installations. Apply it along the seams and edges to prevent moisture from seeping underneath the planks.
Once everything is trimmed and sealed, give your new floor a thorough cleaning. Remove any dust or debris that may have accumulated during installation using a broom or vacuum cleaner. Then mop the entire surface with warm water mixed with mild detergent suitable for vinyl floors.
Take some time to admire your handiwork! Stand back and appreciate how much warmth and beauty vinyl plank flooring has brought into your space. With proper care and maintenance, you can enjoy this durable flooring option for many years ahead.
Remember that every installation can be unique depending on factors such as room size, shape, or personal preferences. So feel free to experiment with different methods until you find what works best for you! Happy installing!
Tips and Tricks
When it comes to installing vinyl plank flooring, there are a few tips and tricks that can make the process go more smoothly. First and foremost, always start with a clean and level subfloor. This will ensure that your planks lay flat and avoid any unevenness.
Another helpful tip is to stagger your planks in random lengths. This will give your floor a more natural look and prevent any noticeable patterns from forming. To achieve this, measure out multiple plank lengths before starting the installation.
To make cutting your vinyl planks easier, use a sharp utility knife or a specialized vinyl cutter. Take care to measure twice before making any cuts to ensure accuracy.
Additionally, consider using adhesive strips or glue when installing your flooring for added stability. These can help prevent shifting or separation of the planks over time.
Be sure to allow for expansion gaps around the perimeter of the room. Vinyl plank flooring needs room to expand and contract with changes in temperature and humidity.
By following these tips and tricks, you’ll be well on your way to successfully staggering your vinyl plank flooring!
Alternatives to Staggering Vinyl Plank Flooring
While staggered vinyl plank flooring is a popular and visually appealing choice, it may not be the right option for everyone. If you’re looking to explore alternative installation methods, here are a few options to consider:
1. Straight Lay: This method involves installing the planks in rows without staggering them. It creates a clean and uniform look but can make imperfections in the subfloor more noticeable.
2. Diagonal Pattern: Installing vinyl planks diagonally can add visual interest and make your space feel larger. However, this method requires careful planning and precise cutting of the planks.
3. Herringbone or Chevron Pattern: These intricate patterns involve laying the planks at angles to create a distinctive design element. They can be challenging to install correctly, but they can transform your space into a stunning showcase.
4. Random Pattern: For those who prefer an eclectic or unique style, randomly placing vinyl planks throughout the room can achieve an interesting effect. Just ensure that you maintain proper spacing between each plank for stability.
Remember that whichever alternative pattern you choose, always follow manufacturer guidelines and recommendations for installation techniques specific to your brand of vinyl plank flooring.
In conclusion,
Staggering vinyl plank flooring is an essential step in achieving both aesthetic appeal and structural integrity when installing this versatile flooring option. By following these simple steps outlined above—gathering tools and materials, carefully measuring and cutting pieces for staggered placement—you’ll have beautiful results that will withstand daily wear and tear for years to come!
So why wait? Get started on transforming your space with stylishly installed staggered vinyl plank flooring today!