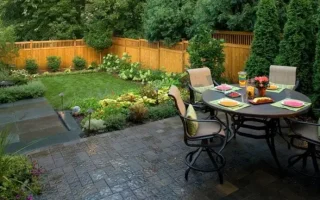
Sports fields were among the earliest applications of artificial grass as it provided easy-to-play and long-term surfaces for games. Currently, with the advancement in technology, the use has increased as home renovation, landscaping is added to this list. Technological advancement had enhanced its look so that most of them opt for commercial, residential sites. Due to ease in handling, Artificial turf, today, gained popularity even among the Do-it-yourselves due to ease of operation, less maintenance requirements and aesthetic appeal. Fake grass has become a product that can be used for such creative indoor projects as well as lawns and balconies; it has evolved with change in lifestyles and designs that people prefer.
The Lifespan of DIY Fake Grass: Factors That Affect Durability
The life of artificial turf varies according to the quality material used, installation methods applied and usage frequency. Better synthetic turf made from firm nylon or polyethylene should last for more than a decade. Installation that is perfect would prevent uneven wear as well as strain, which in turn could be avoided by tamping down the base layer. Intensive sunlight or the high volume of rain it may get may shorten it. Regular maintenance, through brushing of the fibres and clearing out trash, will increase the lifetime of diy fake grass. Sufficient drainage systems should also be done to prevent water damage.
Seasonal Challenges in DIY Fake Grass Installation and How to Overcome Them
Artificial grass installation requires careful preparation since it is susceptible to seasonal challenges such as temperature fluctuations, dampness and time. Soil may dry out during summer, making base preparation and digging difficult. Installation might be ideal in the morning when soil is still soft, or water can be poured on the soil to make digging easier. Various problems occur during winter since diy fake grass becomes hard because of freezing. Warm the turf indoors before installation to make it easier to install and to remain flexible. Heavy rainfall in monsoon seasons may flood the installation site, hence causing delay. Prepare a sturdy base layer that slopes to divert water away and ensure proper drainage. Soil movement due to spring temperature fluctuations can cause uneven surfaces. To avoid problems secure the turf with nails or strong glue. Understanding and preparing for the periodic challenges will be the best in order to ensure a smooth installation. To achieve ideal results, installations should always be planned during good weather by use of good forecasts.
The Role of Base Layers in DIY Fake Grass Installation
A base layer is the most fundamental aspect of a DIY artificial grass installation. It’s what forms the base for guaranteeing the stability, levelness and longevity of the turf. An effective base construction prevents several frequent problems such as uneven surfaces, water pooling, and sinking that may be caused by environmental variables or foot activity. A base layer is, in general, made from gravel, crushed rock, or a mix of elements offering stability and drainage. Because a firm base layer reduces movement and provides a stable substrate for the artificial grass, compaction is important. To separate the soil and base layer and prevent weed growth, geotextile cloth is often placed between them. Important in the construction of the base is drainage.
Water can accumulate from ineffective drainage, damaging the lawn and even causing mildew or odours. The foundation should be angled away from buildings slightly to be sure water flows correctly. A thin layer of sand or fine gravel may also be applied over the subbase after it has been laid down to provide a workable surface on which the turf can be laid out. This extra layer contributes to stability and protects diy fake grass fibres from damage. The foundation for long-standing durability and beauty in homeowner installations of artificial grass relies on a solid base layer.


